In my last post we took a look at some of our most popular resources for using SnapStream. SnapStream cheat sheets, how-to pages, and help file are great resources to get comfortable using the software.
In this series of posts we'll take a look at some of the more advanced features that can be added to your SnapStream workflow to take full advantage of the software's power. In our first post, we'll take a look at playlists and merging, an incredibly helpful tool for presenting the TV clips and recordings you've created with SnapStream.
Playlists and Merging
Now that you've mastered the art of clipping, often the next step will be reviewing the clips. SnapStream's playlist feature allows consecutive playback of two or more clips or recordings.
This is great for meetings, lectures and presentations where you need to review or discuss multiple recordings. SnapStream even gives you the option to merge all of your recordings into a single clip comprised of all of the recordings in your playlist. Follow the steps below to create a playlist and a merged video.
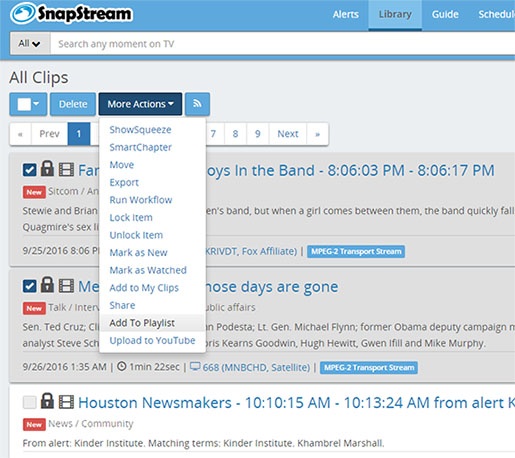
1. Simply select the media you would like to add to the playlist, choose "More Actions" and select "Add to Playlist." You will be prompted to select a name for the playlist or choose a pre-existing playlist.
2. Selecting "Playlists" in the Library will show you all of the different playlists that have been created. To review the recordings, push the button on the playlist. Playback of the first recording will begin in the webplayer. To select between playlist items, use the and buttons.
3. To merge all recordings in a playlist, click and select the "Merge" button. You can choose the file format, target quality, tags and title of the merged file before you begin the merging process.
4. Once the merge has been completed, the finished merged file will be in your clips folder.